

New functionality has been added in order to ensure the allocation batch has the same capabilities of validating the payroll data as on the non-allocating batch process (for more details please refer to Payroll Journal Validation extended the functionality Here).
The Payroll Journal has also been enhanced to ensure segregation of function. Now, only specific users based on user setup, will be able to ‘release’ a payroll batch.
Releasing a payroll batch allows the user to complete the steps to finalize the payment process.
Payroll Journal Release and Re-Open User Setup
An additional setting called Payrol Jnl, Release/Re-Open, has been added to the user setup. It is now possible to select different capabilities for different Users.
Setup to Enable Release and Re-Open capabilities
To setup Payroll journal release and re-open capabilities for specific users:
1. Navigate to Edit – User Setup Card (the card specific to the user for whom you wish to enable these capabilities).
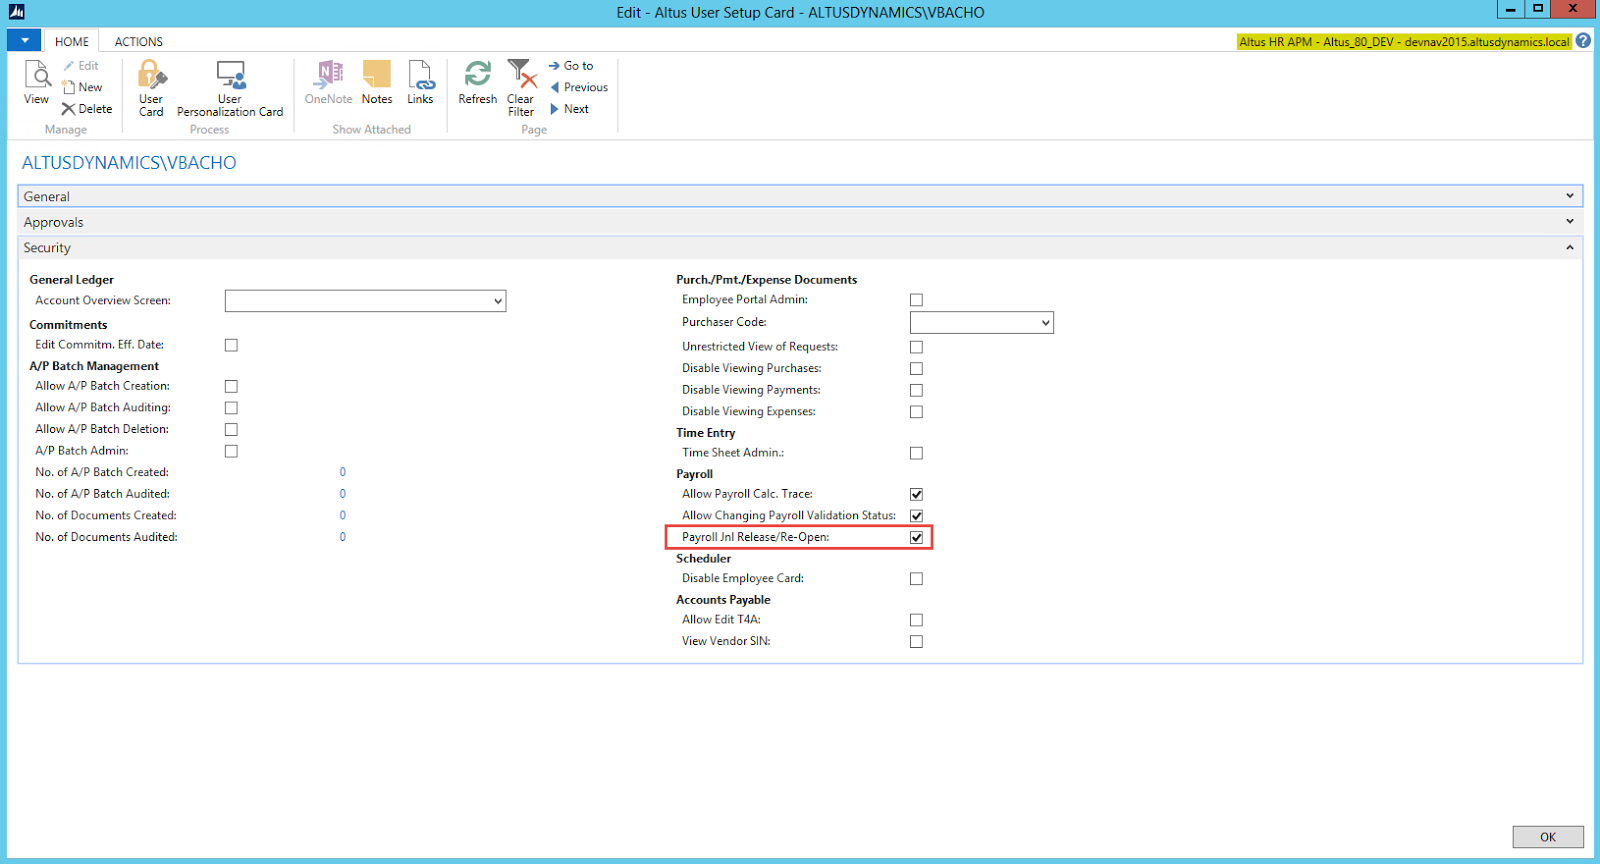
2. From the Security tab place a checkmark in the Payroll Jnl Release/Re-Open field.
Users with this setting set to yes (Checkmark ON) will have the ability to Release and Re-Open the batch and they can perform payroll tasks end to end without restrictions.
3. Click OK at the bottom right to save the setting.
Setup to Disable Release and Re-Open capabilities
To ensure that a user cannot ‘release’ a payroll batch:
1. Navigate to Edit – User Setup Card (the card specific to the user for whom you wish to disable the capabilities of releasing a payroll batch.
2. From the Security tab, uncheck the Payroll Jnl Release/Re-Open field.
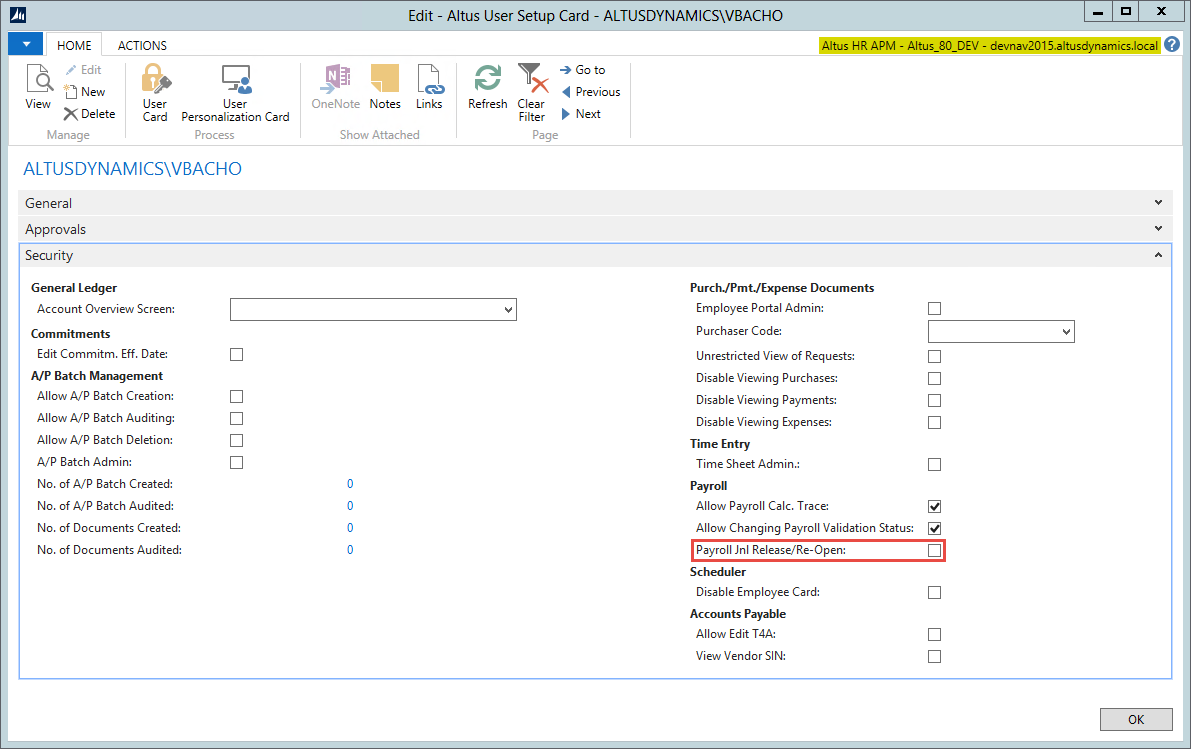
NOTE: The system automatically defaults to Payroll Jnl Release/Re-Open unchecked. Unless you have checked this for a specific user, you will not need to uncheck it.
3. All users who do not have a checkmark in the Payroll Jnl Release/Re-Open field from the Security tab in their User Setup Card will only be able to perform the following
functions:
- Payroll Journal Pre-Load
- Get Time Entries
- Get Schedule Entries
- Get Sub Incidents
- Get Employee Allocations
- Import Payroll Lines
- Calculate Single Employee
- Calculate
- Combine Batches
- Preview Cheque
- Open Allocation Posting Batch
- Print Cheque – ONLY AFTER THE BATCH HAS BEEN RELEASED BY AN AUTHORIZED USER
- Print Pay Advises
- Export File
- Transmit File
- Void Pay Cheque /Pay Advise
- Post Payroll